Pin It
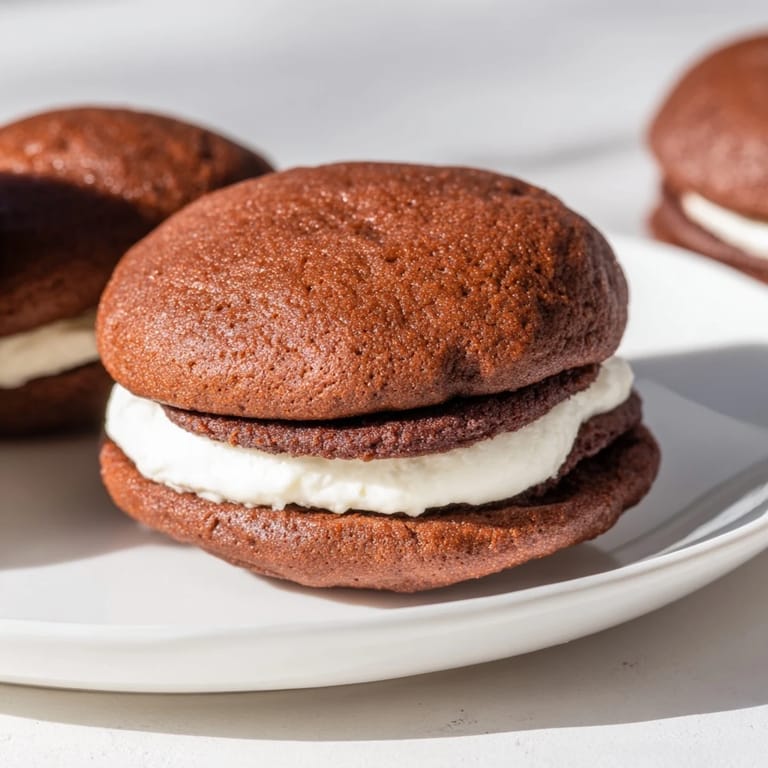
 My mom kept a tin of whoopie pies in the freezer for emergencies—not the kind where you need a fire extinguisher, but the kind where someone needed comfort at three in the afternoon. I didn't understand why until I bit into one at her kitchen table on a rainy Tuesday, and suddenly the soft chocolate cake and that pillowy vanilla filling felt like a hug I didn't know I needed. Now I make them the same way, and they disappear just as mysteriously.
The first time I made these for my partner's coworkers, I was terrified they'd taste homemade in a bad way—you know, dry or too cakey or something. But watching everyone's faces when they bit through that soft chocolate into the creamy center told me everything I needed to know. One person actually closed their eyes. That's when I realized whoopie pies weren't just a snack; they were a moment of joy you could hold in your hand.
Ingredients
- All-purpose flour (2 cups): The foundation of the cake—make sure to spoon and level it rather than scooping straight from the bag, which can pack too much flour in and dry everything out.
- Unsweetened cocoa powder (¾ cup): This is where the deep chocolate flavor lives; don't skip it or use the sweetened stuff because the sugar is already in the recipe.
- Baking soda and baking powder (1½ teaspoons and ½ teaspoon): Together they create that tender crumb and help the cakes rise just enough to stay soft.
- Granulated sugar (1 cup): Works with the butter and oil to create a tender, moist cake that won't go stale quickly.
- Unsalted butter and vegetable oil (½ cup each): The combination of butter and oil keeps the cakes soft and fudgy instead of becoming dense.
- Eggs (2 large): Bind everything together while adding richness and structure.
- Buttermilk (1 cup): The acid in buttermilk reacts with the baking soda to create lift, and it keeps the crumb incredibly tender.
- Vanilla extract (2 teaspoons): Rounds out the chocolate flavor with warmth and depth.
- Unsalted butter for filling (¾ cup): Use real butter here; it makes a difference in the taste and texture compared to shortening.
- Powdered sugar (2 cups, sifted): Sift it to prevent lumps that can mar the smooth filling.
- Marshmallow creme (1 jar, about 7 oz): This is the secret ingredient that makes the filling clouds instead of dense frosting; it creates that signature fluffy texture.
Tired of Takeout? 🥡
Get 10 meals you can make faster than delivery arrives. Seriously.
One email. No spam. Unsubscribe anytime.
Instructions
- Get your oven and pans ready:
- Preheat your oven to 350°F and line two baking sheets with parchment paper. This prevents sticking and gives you even browning on the bottoms.
- Mix the dry ingredients:
- In a medium bowl, whisk together the flour, cocoa powder, baking soda, baking powder, and salt. Whisking aerates the cocoa and distributes the leavening agents evenly, which is crucial for an even crumb.
- Cream the wet ingredients:
- Beat the sugar, butter, and oil together until the mixture is light, fluffy, and pale—this usually takes about 2-3 minutes. Add the eggs one at a time, beating well after each addition so they fully incorporate.
- Add vanilla and alternate the wet and dry:
- Stir in the vanilla, then add the flour mixture and buttermilk alternately, starting and ending with the flour. This prevents overmixing, which would toughen the cakes.
- Scoop the batter:
- Drop 2-tablespoon-sized mounds onto your prepared sheets, leaving about 2 inches between each one. They'll spread slightly as they bake, so spacing matters.
- Bake until they spring back:
- Bake for 10-12 minutes; you'll know they're done when they spring back when you lightly touch the top. Don't overbake or they'll be dry instead of that tender, fudgy texture you're after.
- Cool with patience:
- Let them cool on the pan for 5 minutes so they firm up, then transfer to a cooling rack to cool completely. Trying to fill warm cakes is a messy disaster I learned the hard way.
- Make the filling:
- Beat the softened butter until it's smooth, then gradually add the powdered sugar so you don't get clouds of sugar everywhere. Mix in the marshmallow creme, vanilla, and salt, then beat until it's fluffy and light.
- Assemble your pies:
- Spread or pipe filling onto the flat side of half the cakes, then top with the remaining cakes to create sandwiches. The flat sides should face each other so the filling is hugged on both sides.
- Chill before serving:
- Pop them in the fridge for 30 minutes so the filling sets slightly and the whole thing firms up. This makes them easier to handle and improves the texture when you bite into them.
 Pin It
 I'll never forget the day my neighbor tasted one of these and immediately asked for the recipe—not to bake them herself, but to remember what homemade felt like. That's when I understood that food like this isn't about impressing anyone; it's about creating a small moment of genuine comfort.
The Pennsylvania Dutch Story
Whoopie pies are a Pennsylvania Dutch classic, and if you've ever been to Lancaster County or had them fresh from a local bakery, you understand why they've been passed down for generations. They're humble, unpretentious, and somehow better than they have any right to be. The name supposedly came from children who would shout "whoopie!" when they found one in their lunch box, which feels right—it's the kind of dessert that makes you want to celebrate.
Flavor Variations That Actually Work
Once you've mastered the classic, you can gently experiment with the formula. A teaspoon of espresso powder in the cake batter deepens the chocolate flavor without making them taste like coffee. For a special occasion, add a tablespoon of rum or a few drops of peppermint extract to the filling. The key is making small changes rather than overhauling the recipe, because what makes whoopie pies special is their simplicity.
Storage and Serving Secrets
These keep beautifully in an airtight container at room temperature for up to three days, or you can freeze them for up to a month if you want to get ahead. Pull them from the freezer 10 minutes before serving so they're not stone-hard. The filling can also be made a day ahead and stored in the fridge, then brought to room temperature before assembling.
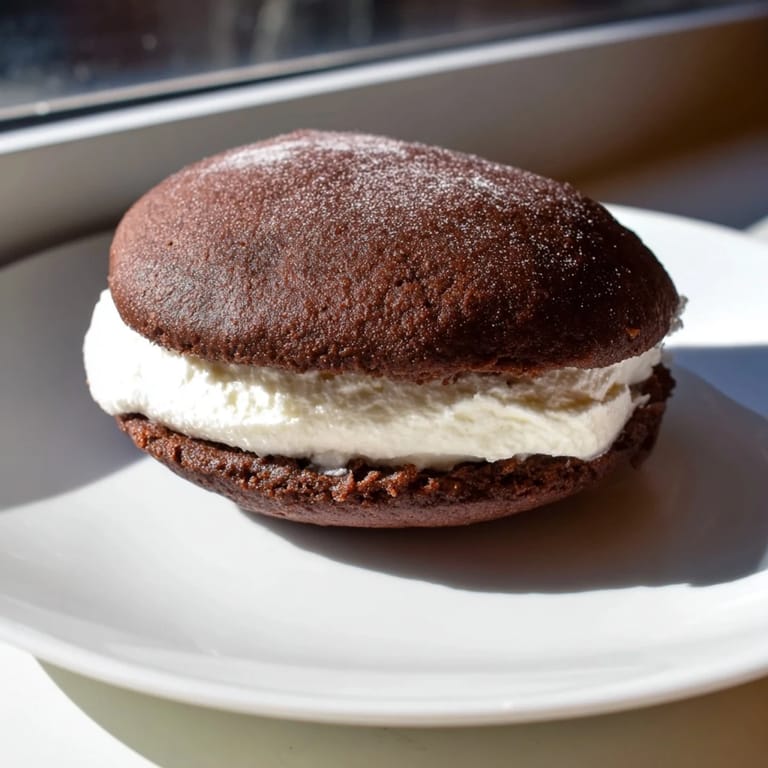
- For a showstopper presentation, dust the filled pies with a bit of cocoa powder or powdered sugar just before serving.
- If you find yourself with leftover filling, it's excellent spread on brownies or stirred into milk for hot chocolate.
- Pro move: make a double batch of cakes and freeze the unfilled ones for up to a month, then fill them fresh whenever you need dessert in minutes.
 Pin It
 Whoopie pies are proof that the simplest things, made with a little care, become the ones people remember. Every time someone bites into one you've made, you're not just serving dessert—you're handing them a small, delicious moment of joy.
Recipe FAQs
- → What gives the cakes their soft texture?
The combination of buttermilk, vegetable oil, and proper mixing creates a moist, tender cake with a soft crumb.
- → How can I enhance the chocolate flavor?
Adding a small amount of espresso powder to the batter deepens the chocolate taste without overpowering.
- → Can I prepare the filling ahead of time?
Yes, the cream filling can be made in advance and chilled. Bring to room temperature before assembling for easiest spreading.
- → What is the best way to store these sandwiches?
Store in an airtight container at room temperature for up to 3 days to maintain freshness and texture.
- → Are these treats suitable for vegetarians?
Yes, the ingredients used are vegetarian-friendly, containing no meat or gelatin.