 Pin It
 My nephew's eyes lit up the moment he spotted the cake on the kitchen counter—bright red layers with that unmistakable black fondant hair and cheeky white eyes staring back at him. I'd never made a Betty Boop cake before, but something about recreating that vintage cartoon character in buttercream and fondant felt like edible nostalgia. The challenge wasn't just baking two perfect red velvet layers; it was capturing that playful, slightly mischievous expression that made the cake feel alive. Standing in the kitchen at midnight, rolling out black fondant and carefully cutting Betty's signature bob, I realized this wasn't just about following instructions—it was about bringing a little cartoon magic to life, one fondant curl at a time.
I'll never forget watching my daughter's face when she realized the cake she'd been asking for—the one from her vintage cartoon marathon—was actually on our dining table. She grabbed a camera before anyone could cut a slice, insisting on documenting Betty's perfect smile. That moment shifted something for me: baking this cake wasn't just about technique or ingredients anymore; it became about creating a memory someone would actually treasure.
Ingredients
- All-purpose flour: Two cups of sifted, measured flour creates the tender crumb you're after—don't pack it down when measuring, or your cake becomes dense.
- Granulated sugar: At a cup and a half, this sweetens the cake while creaming with butter incorporates air for lift.
- Baking powder: Two teaspoons ensures the cake rises evenly without overdoing it; check your powder's expiration date because stale baking powder betrays even careful mixing.
- Unsalted butter: Room temperature butter creams smoothly, and unsalted gives you control over salt balance—this matters more than you'd think.
- Large eggs at room temperature: Cold eggs won't emulsify properly, leaving you with a grainy batter; set them on the counter 30 minutes before baking.
- Whole milk: The dairy adds richness and tenderness; don't substitute with lower-fat milk if you want that velvet mouthfeel.
- Red gel food coloring: One tablespoon gives deep red, but gel coloring doesn't water down the batter like liquid coloring does—this is the secret to saturated color without moisture problems.
- Cream cheese and butter for frosting: Both must be room temperature or you'll end up with lumpy, grainy buttercream; if you mess this up, pop the bowl in warm water for 30 seconds.
- Powdered sugar: Sifting it removes lumps and makes beating in smoother, preventing grainy frosting.
- Black, white, and red fondant: Quality fondant rolls easier and tastes less plasticky; store opened fondant wrapped tightly in plastic to prevent drying.
- Edible pearl dust: Optional but transforms plain fondant into something that catches light like Betty's signature glamour.
Tired of Takeout? 🥡
Get 10 meals you can make faster than delivery arrives. Seriously.
One email. No spam. Unsubscribe anytime.
Instructions
- Prep your pans and heat your oven:
- Set the oven to 350°F and grease both 8-inch pans thoroughly, then line them with parchment—wet parchment sticks better than dry. This step feels small but saves you from crumbled cake edges and the frustration of frosting that's half on the cake, half on the pan.
- Combine your dry ingredients:
- Whisk flour, baking powder, and salt in a medium bowl and set aside. This pre-mixing ensures even distribution, so you won't bite into a pocket of salty cake later.
- Cream butter and sugar until light:
- Using an electric mixer on medium speed, beat for about 3 minutes until the mixture looks pale and fluffy, almost like pale sand. Listen for the mixer to quiet down slightly—that's when you know air has been properly incorporated.
- Add eggs one at a time:
- After each egg, beat well until incorporated; rushing this step leaves you with lumpy batter that won't bake evenly. Stir in vanilla extract after the final egg.
- Alternate flour and milk gently:
- On low speed, add a third of the flour mixture, then half the milk, then another third of flour, then the remaining milk, then the last flour portion. This method prevents overdeveloping gluten and keeps the crumb tender.
- Mix in the red coloring:
- Add gel coloring gradually and mix until the batter reaches a deep, uniform red—you want color that looks intentional, not pale or streaky. If you go too light, the cake reads more pink than red.
- Bake with intention:
- Divide batter evenly between pans and bake for 25-30 minutes, rotating halfway through for even coloring. When a toothpick inserted in the center comes out clean with just a crumb or two, you're done—overbaking dries it out.
- Cool properly:
- Let cakes rest in pans for 10 minutes so they firm up slightly, then invert onto racks to cool completely. This 10-minute wait prevents collapsing and makes unmolding easier.
- Make your buttercream while waiting:
- Beat room-temperature cream cheese and butter together until smooth, about 2 minutes; if you see graininess, the ingredients weren't warm enough. Gradually add powdered sugar one cup at a time on low speed to avoid creating a sugar cloud in your kitchen, then beat on medium until fluffy.
- Level and layer your cakes:
- Using a serrated knife, carefully trim the domed tops off both cakes so they sit flat. Place one layer on your cake board, spread buttercream on top, then gently position the second layer—if it slides, your frosting is still too soft.
- Apply the crumb coat:
- Spread a thin layer of buttercream around the entire cake, seal in any crumbs, then chill for 20 minutes. This crumb coat prevents loose crumbs from mixing into your final frosting.
- Final frosting coat:
- Remove from the fridge and apply a generous, smooth layer of buttercream all over, using an offset spatula or cake scraper to even it out. Work quickly so the cold frosting doesn't warm up and become too soft to smooth.
- Roll and cut fondant:
- Dust your work surface with cornstarch, roll black fondant to about 1/8-inch thickness, and cut out Betty's hair silhouette using a template or freehand—it doesn't need to be perfect, just playful. Roll white fondant for eyes and hearts, red for lips; dust with edible pearl dust if desired for that vintage glamour.
- Assemble Betty's face:
- Once the cake is thoroughly chilled and frosting is firm, gently drape the black fondant hair over the front, trimming excess at the base with a sharp knife. Attach white eyes and red lips using tiny dabs of buttercream as adhesive, then position black fondant eyelashes and eyebrows around the eyes.
- Add finishing touches:
- Roll a thin red fondant coil for her headband and place it across the hair, or add sugar flowers and edible sparkles around the base. Let the decorated cake rest at room temperature for 30 minutes before slicing so the fondant sets slightly and the flavors meld.
 Pin It
 There's something almost magical about stepping back and seeing Betty Boop materialize on a cake you made with your own hands—this black-haired, ruby-lipped cartoon icon suddenly tangible and edible. The room felt different once she was done, like we'd transported a piece of vintage animation into real life, one fondant detail at a time.
Why Fondant Matters More Than You Think
Fondant transforms a beautifully frosted cake into something sculptural, something that makes people pause before cutting into it because they don't want to disturb the art. With Betty Boop, fondant isn't just decoration—it's characterization, giving her that glossy, almost doll-like quality that makes the cake feel like it stepped out of a 1930s animation cel. The smooth, seamless coverage fondant provides is impossible to achieve with frosting alone, especially when you're creating defined shapes like Betty's iconic hair and eyes.
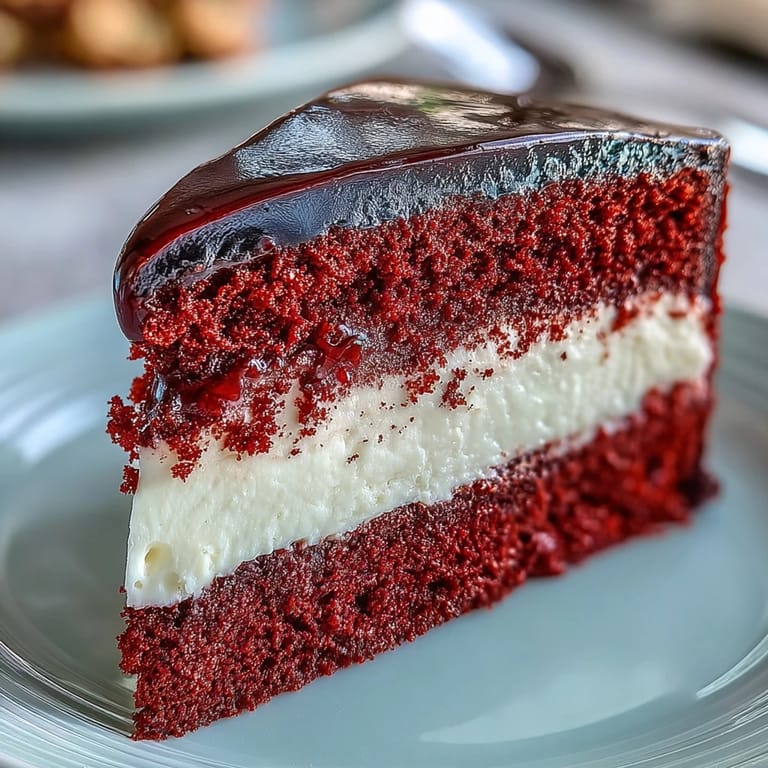
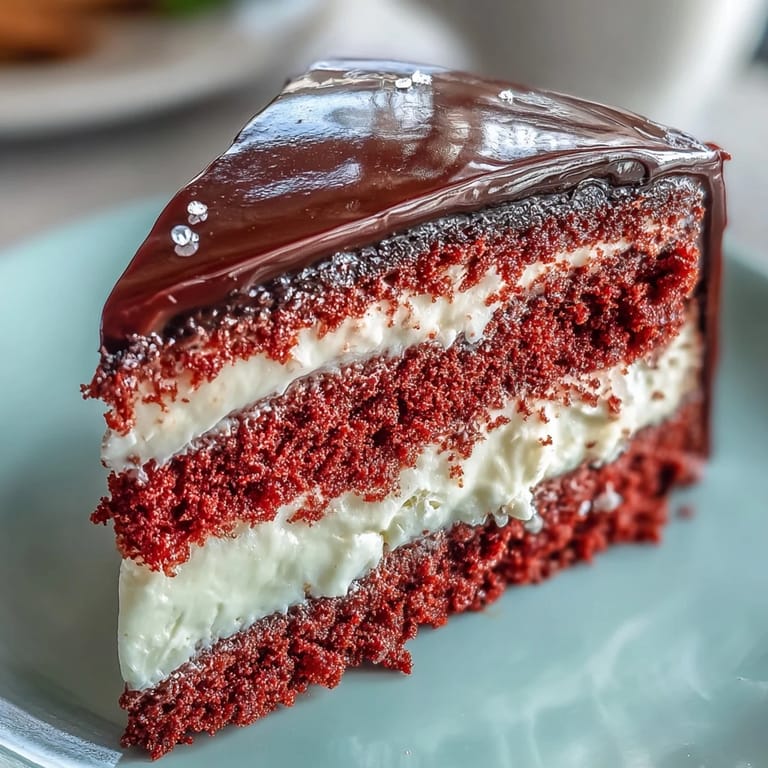
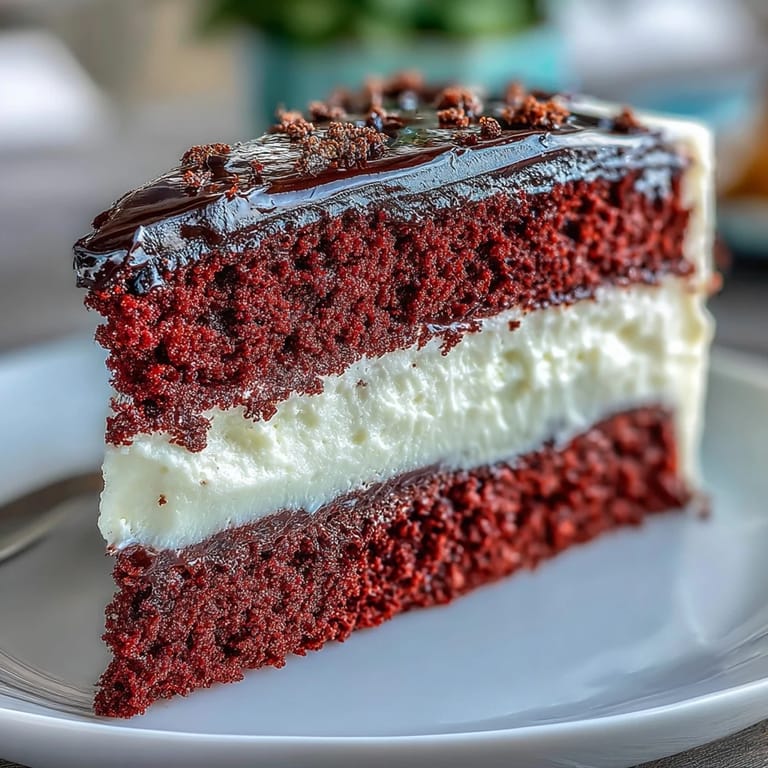
The Red Velvet Flavor Advantage
Red velvet cake sits in this beautiful middle ground between chocolate cake and vanilla—it has the subtle cocoa flavor and tangy notes that make it distinctive without being overwhelmingly rich. The combination of buttermilk's tang and a whisper of cocoa powder creates depth that plays perfectly against the brightness of cream cheese frosting, turning what could be just another fancy cake into something memorable. If you want to lean into the classic red velvet taste, you can swap in 1 teaspoon cocoa powder and 1 teaspoon white vinegar for some of the milk, creating that signature complexity.
Decorating Tricks and Timing
The biggest decorating mistake people make is rushing to add fondant before the frosting is truly firm, which causes everything to slip and slide like you're working on ice. I learned to chill the cake longer than seemed necessary, sometimes even 30-45 minutes before fondant application, because that extra time means your decorations stay exactly where you put them. Fondant elements can be prepared a full day ahead and stored in an airtight container at room temperature, which means you can focus on baking the cake and frosting it without feeling rushed by the decorating portion.
- Use a template for Betty's hair silhouette so your cuts are consistent and recognizable, even if freehand feels more spontaneous.
- Attach fondant pieces with tiny dabs of buttercream, not water—buttercream acts like edible glue and doesn't dissolve the fondant.
- Work quickly once you remove the cake from the fridge because warm frosting destabilizes fondant placement, so have all your fondant elements cut and ready before you begin assembly.
 Pin It
 Making a Betty Boop cake is less about following a recipe perfectly and more about embracing the playfulness of the character—your Betty doesn't need to be flawless to be charming. This cake will make people smile the moment they see it, and that joy makes every careful step worth it.
Recipe FAQs
- → How far in advance can I make the fondant decorations?
Fondant decorations can be prepared one day ahead and stored in an airtight container at room temperature. Keep them away from moisture and humidity to prevent softening or sticking.
- → Can I use Swiss meringue buttercream instead?
Yes, Swiss meringue buttercream creates a lighter, silkier finish that pairs beautifully with red velvet layers. It also holds up well under fondant decorations and provides excellent stability for warmer environments.
- → What's the best way to achieve deep red color?
Use high-quality gel food coloring rather than liquid versions for intense color without thinning the batter. Start with one tablespoon and add more as needed, remembering that color deepens slightly during baking.
- → Do I need dowels for stability?
For a two-layer cake, dowels aren't strictly necessary but can provide extra insurance during transport. If serving at the location, the crumb coat technique typically provides sufficient structure for the fondant overlay.
- → How should I store the finished creation?
Keep refrigerated due to the cream cheese frosting. Bring to room temperature 30 minutes before serving for optimal texture and flavor. The fondant decorations may sweat slightly when removed from cold, so plan decorating time accordingly.