 Pin It
 There's something almost meditative about watching sugar transform into caramel, that exact moment when it shifts from clear to amber and you realize you're just seconds away from getting it right or burning it completely. I first made these sea salt caramels on a quiet Sunday afternoon, armed with a candy thermometer I'd just bought and absolutely no chill about the whole operation. The second the cream hit that bubbling caramel mass, I jumped back like I'd touched fire, but somehow—miraculously—they turned out creamy and perfect. Now they're the one thing people actually request when I mention I'm bringing homemade candy anywhere.
I brought a box of these to my neighbor's book club last year, thinking they'd be a nice enough gesture. One woman actually closed her eyes when she bit into one and didn't say anything for a solid five seconds. That's the moment I realized these weren't just candy—they were the kind of small gift that makes people feel genuinely cared for. She asked for the recipe that night, and I've made three batches for her since.
Ingredients
- Heavy cream: Full-fat cream is your non-negotiable here because it creates that silk-like texture; don't try to cut corners with half-and-half.
- Unsalted butter: Cutting it into pieces helps it melt evenly into the cream without hot spots.
- Granulated sugar: The foundation of everything; make sure it's truly granulated and not caster or super fine, which can crystallize unexpectedly.
- Light corn syrup: This prevents crystallization during cooking, which sounds small but changes everything about the final texture.
- Water: Just enough to help the sugar dissolve smoothly without adding moisture to the final product.
- Pure vanilla extract: The good stuff matters here because it's one of only a few flavoring ingredients.
- Fine sea salt (for cooking): This dissolves into the caramel and becomes part of the flavor rather than a texture element.
- Flaky sea salt (for finishing): Maldon or similar gives you those little crystals that pop when you bite through and remind you this is special.
Tired of Takeout? 🥡
Get 10 meals you can make faster than delivery arrives. Seriously.
One email. No spam. Unsubscribe anytime.
Instructions
- Prep Your Pan:
- Line your 8x8-inch pan with parchment paper, leaving edges hanging over two sides like handles. Butter that parchment lightly so the finished caramels don't stick and tear when you lift them out later.
- Warm the Cream:
- Heat your cream and butter together over medium heat until the butter completely melts and small bubbles start forming around the edges. You want it hot but not simmering, then remove it and let it wait patiently for the caramel to be ready.
- Start the Caramel:
- Combine sugar, corn syrup, and water in a large heavy-bottomed saucepan and stir gently just until it looks like wet sand. Stop stirring and let the heat do the work from here on out.
- Watch It Change:
- Turn up the heat to medium-high and watch without stirring as the mixture bubbles and gradually transforms from clear to pale golden to a light amber color. Use your candy thermometer to catch it at exactly 320°F; this is where magic happens.
- The Dangerous Pour:
- Remove the caramel from heat and very carefully pour the warm cream mixture in slowly while stirring constantly, because yes, it will bubble up like a small volcano and that's completely normal. Keep stirring and cooking until your thermometer reads 245°F for soft caramels or up to 250°F if you like them just slightly firmer.
- Add the Flavor:
- Pull it off the heat and stir in vanilla extract and your fine sea salt, then immediately pour the entire hot mixture into your waiting prepared pan. The speed here matters because caramel sets quickly once it stops cooking.
- The Salt Finish:
- Let the caramel sit for about 5 minutes until it stops steaming, then sprinkle your flaky sea salt evenly across the top. The warmth will help it settle into the surface beautifully.
- Cool and Cut:
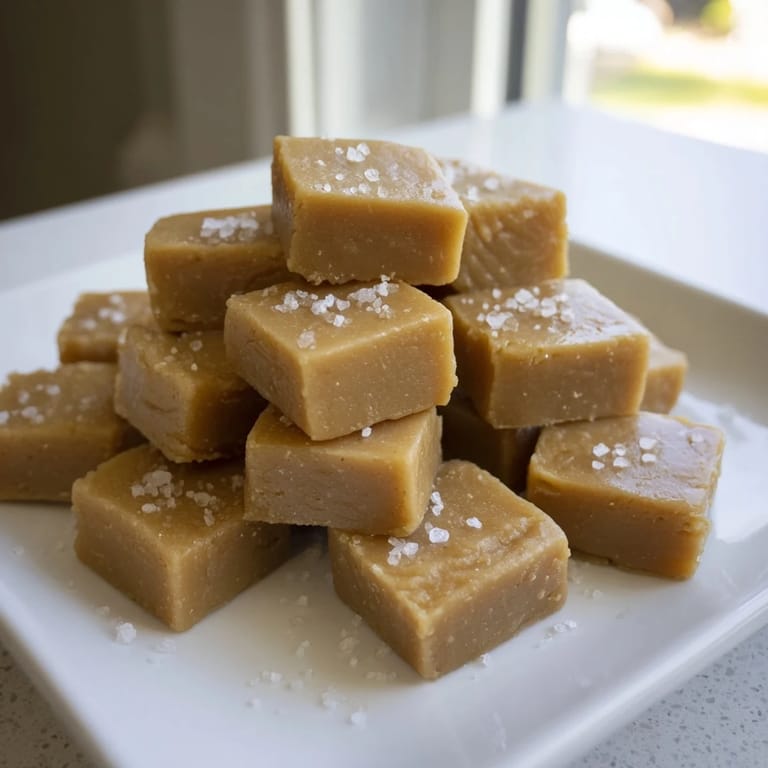
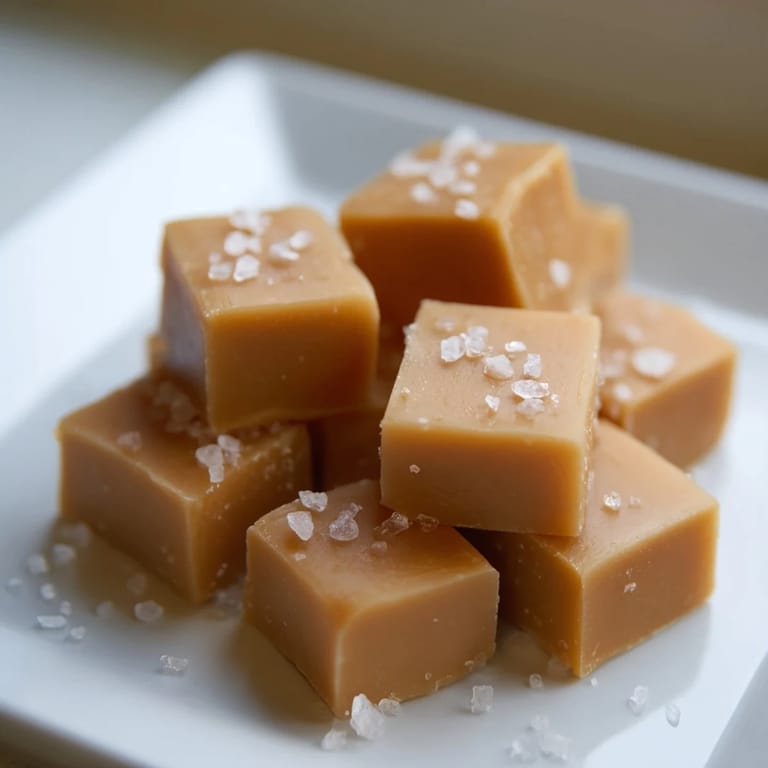
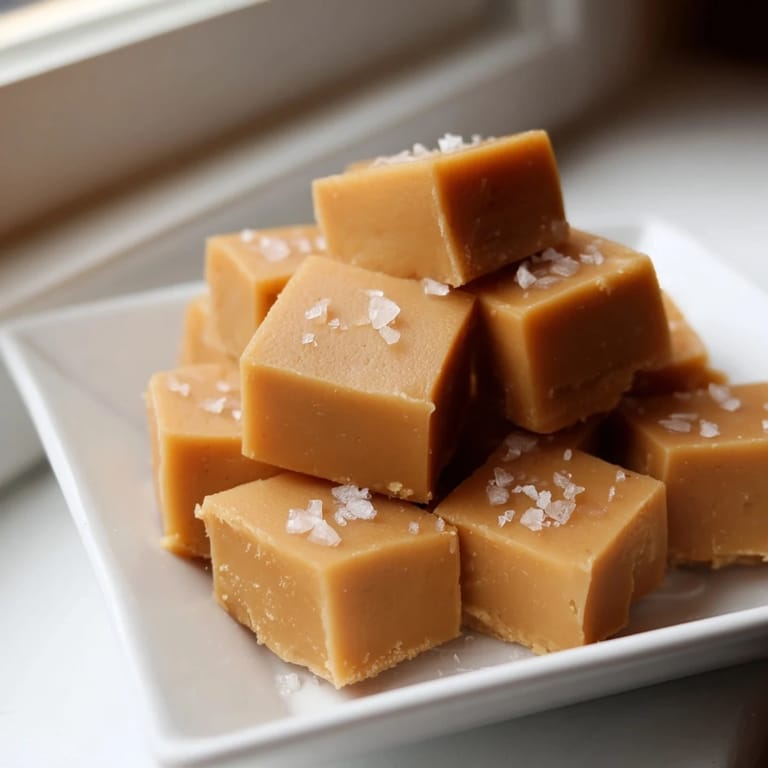
- Let everything cool completely at room temperature, which takes about 2 hours and requires patience but is absolutely essential. Once set, lift the whole sheet out using those parchment handles, cut into 1-inch squares with a sharp knife (wiping between cuts helps), then wrap each piece individually in wax paper or cellophane.
 Pin It
 My first batch crystallized halfway through because I got nervous and started stirring too much, which taught me more than any successful batch could have. Now whenever someone mentions they're afraid to make candy, I tell them about that disaster and watch their shoulders relax because suddenly it feels less like professional baking and more like a normal kitchen experiment that might not go perfectly but will probably still taste great.
The Brown Butter Secret
If you want to add an extra layer of flavor that makes people ask what's different, brown your butter before adding it to the cream. Melt it in a separate pan over medium heat and watch until it turns golden with little brown flecks at the bottom, then strain out those solids and use just the liquid. It adds a nutty depth that regular butter simply can't deliver, and suddenly your caramels taste like they come from a fancy candy shop instead of your kitchen.
Wrapping and Storage
Individual wrapping does more than prevent sticking—it transforms a simple candy into something that feels like a gift even to yourself. I learned this by giving someone a box wrapped in wax paper with little twine bows, and they kept one for three weeks because it felt too pretty to eat. Store your finished caramels in an airtight container at room temperature for up to two weeks, though honestly they rarely last that long around people who appreciate them.
Taking It Further
Once you're comfortable with the basic recipe, the possibilities become endless. Try dipping finished caramels in melted dark chocolate for a completely different experience, or roll them in toasted nuts before the chocolate sets, or even experiment with adding a tiny pinch of espresso powder to the caramel itself. The foundation is rock-solid, so you can play around with variations once you've nailed the fundamentals.
- Dark chocolate-dipped versions need to cool completely before wrapping or the chocolate will stick and crack.
- Sea salt works better than table salt for finishing because the crystals stay visible and crunchy.
- Make these when you're not rushed because good caramel is worth the full attention your kitchen deserves.
 Pin It
 These sea salt caramels have become the thing I make when I want to remind someone they matter, or when I need to prove to myself that something made with intention and attention tastes fundamentally different. Every time you nail that amber stage and the caramel turns out perfect, you'll understand why people have been making candy the same way for generations.
Recipe FAQs
- → What makes these caramels soft and chewy?
Cooking the caramel mixture to around 245°F (118°C) ensures a soft, chewy texture while maintaining rich buttery flavor.
- → Why is flaky sea salt used as a topping?
Flaky sea salt adds a delicate crunch and balances sweetness with a subtle salty contrast to enhance flavor complexity.
- → Can I substitute unsalted butter with salted butter?
Using salted butter may affect the final saltiness, so it's best to use unsalted butter to control the salt balance precisely.
- → How do I prevent the caramel from sticking to the pan?
Line the baking pan with parchment paper and lightly butter it to allow easy removal of the set caramels.
- → What is the purpose of corn syrup in this?
Corn syrup helps prevent crystallization of sugar, resulting in a smooth, glossy texture in the caramel.
- → Can the caramel be stored for later enjoyment?
Store caramels in an airtight container at room temperature for up to two weeks to maintain freshness and texture.