 Pin It
 My grandmother kept a tin of peanut brittle hidden behind the flour canister, and I'd discovered it by accident while searching for chocolate chips one winter afternoon. The moment I cracked a piece between my teeth, that sharp snap followed by the buttery sweetness dissolving on my tongue, I understood why she guarded it so carefully. Years later, I finally asked for her technique, and she laughed—said the real secret wasn't in some fancy trick, just patience and a candy thermometer that actually worked. Now when I make it, that sound of the brittle cooling on the pan takes me right back to her kitchen, steam rising from the stovetop while snow fell outside.
I made this for my neighbor's holiday party last year, nervous because I'd never attempted candy before, and somehow ended up with three batches cooling on every available surface in my kitchen. By the time people arrived, the house smelled like caramelized sugar and butter, and watching someone bite into a piece, their eyes light up—that's when I realized homemade candy is basically edible magic.
Ingredients
- Granulated sugar (1 cup): This is your foundation—don't skip it or swap it out, as it's what creates that glossy, glass-like candy shell.
- Light corn syrup (1/2 cup): This prevents crystallization and keeps your brittle smooth instead of grainy, which I learned the hard way during my first attempt.
- Water (1/4 cup): Just enough to get everything dissolved before the real cooking begins.
- Salt (1/4 tsp): A tiny pinch that makes the sweetness sing without tasting salty—trust this measurement.
- Unsalted butter (2 tbsp): Cut into pieces so it melts evenly into the hot candy, adding that rich, almost honeyed flavor.
- Vanilla extract (1 tsp): This sneaks in right at the end and deepens the whole taste experience.
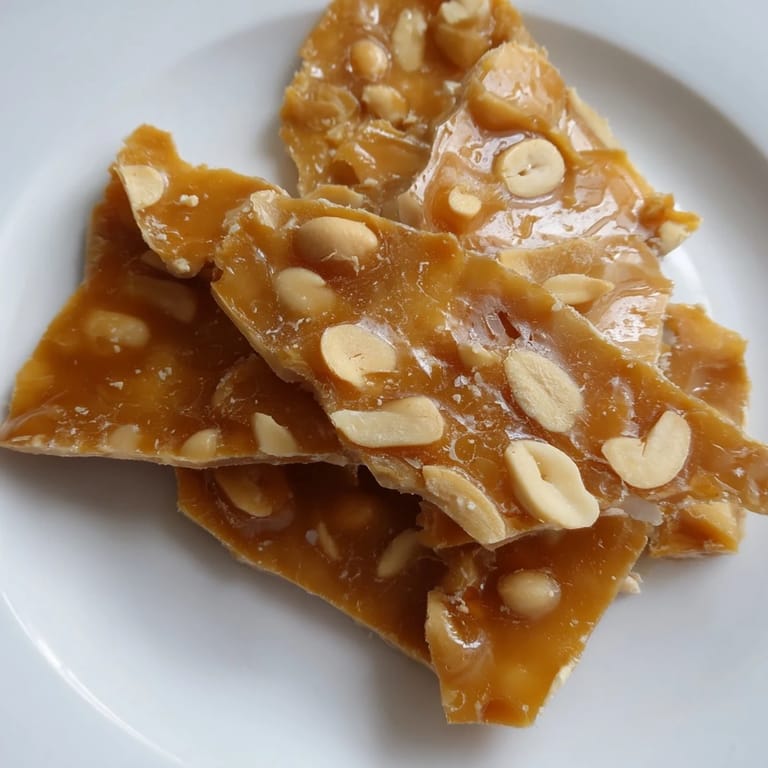
- Roasted, unsalted peanuts (1 1/2 cups): The star of the show—buy the best quality you can find because they're not hidden under chocolate or caramel, they're front and center.
- Baking soda (1 tsp): This creates that signature light, airy texture and makes the whole batch foam up like something magical just happened.
Tired of Takeout? 🥡
Get 10 meals you can make faster than delivery arrives. Seriously.
One email. No spam. Unsubscribe anytime.
Instructions
- Set Your Stage:
- Line your baking sheet with parchment paper or a silicone mat and give it a light grease—this is where all your hard work is about to land, so make it inviting. Have everything measured and ready because once this candy starts cooking, there's no pausing to find the vanilla extract.
- Combine and Stir:
- In your heavy saucepan, mix the sugar, corn syrup, water, and salt over medium heat, stirring gently until the sugar completely dissolves and the mixture looks smooth. This is the calm before the storm, the moment where everything is still cooperating.
- Let It Boil:
- Stop stirring once it comes to a boil and clip your candy thermometer to the side of the pan—this is critical because you need to watch the temperature climb, not guess. The mixture will go from pale yellow to deeper amber as it heats, and that color change is honestly mesmerizing to watch.
- Hit the Hard Crack:
- Let it bubble away until your thermometer hits 300°F (that hard crack stage takes about 10 to 15 minutes), and I promise you'll start checking obsessively because candy making is part cooking, part suspense. The second it reaches temperature, pull it off the heat—staying even one minute too long transforms it from brittle to burnt.
- The Sudden Alchemy:
- Quickly stir in the butter and vanilla, then immediately add your peanuts and mix like you mean it, coating every nut in that glossy caramel. The heat will still be doing the work, so move with intention but don't panic.
- Create the Foam:
- Sprinkle in the baking soda and stir briskly—this is the moment the candy transforms, foaming up and becoming lighter, almost like edible cloud. It's thrilling every single time because it feels like something alive just happened in your pan.
- The Pour:
- Immediately spread the foaming mixture onto your prepared baking sheet using a greased spatula, working quickly to get it thin and even (about 1/4 inch thick) before it sets. If it cools too much before you're done spreading, the whole thing will seize, so this is your moment to move with confidence.
- The Hardest Part—Waiting:
- Let it cool completely for about 30 minutes, and I mean truly cool—breaking into it too early just gets you sticky fingers and sadness. Once it's set, break it into pieces with your hands (it'll crack naturally along stress lines) and try not to eat half of it before storing it away.
 Pin It
 My sister called me in tears once because she'd been sent a box of my peanut brittle at college, said it reminded her of home in the most unexpected way—not because she was homesick, but because it meant someone was thinking of her. That's when I realized this isn't just candy; it's edible proof that you took time out of your day to make something specifically for someone.
The Science of Sweetness
The moment baking soda hits that hot caramel, it creates carbon dioxide bubbles that lighten the candy and give it that signature crispy texture that makes it actually break cleanly between your teeth instead of stubbornly sticking. The corn syrup and water combination prevents sugar crystals from forming, which is why homemade brittle feels smooth and glassy rather than grainy like some commercial versions. Temperature control matters because at 300°F you've crossed into the hard crack stage where the candy will shatter instead of bend, and that's exactly what you want.
Variations That Feel Natural
Once you nail the base recipe, you start seeing possibilities everywhere—I've made versions with cashews during the fancy dinner phase, pecans when I wanted something more elegant, and almonds when a friend mentioned she preferred them. Sea salt sprinkled over the top right before it sets completely changes the whole game, adding this sophisticated salty-sweet thing that makes people pause and ask what you did differently. Some seasons I add a tiny splash of bourbon or a whisper of cayenne pepper, just enough to make people wonder what they're tasting.
Storage and Staying Power
This brittle genuinely lasts for two weeks if you store it right, tucked in an airtight container away from humidity, and it makes an absolutely stellar last-minute gift because it looks homemade without requiring you to wrap each piece individually. I've learned to make a batch every November, stick it away in my pantry, and suddenly I'm the person who always has something thoughtful to bring places—turns out people really do appreciate homemade candy more than store-bought anything.
- Keep it sealed tight in an airtight container, and if you live somewhere humid, throw in a silica gel packet to keep moisture out.
- Label it with the date so you actually remember when you made it instead of discovering it mysteriously three months later.
- Wrap pieces individually in parchment if you're gifting it, because presentation matters and it keeps them from sticking together.
 Pin It
 There's something deeply satisfying about making candy that actually works, that cracks properly and tastes like actual butter and roasted nuts instead of artificial sweetness. Every time someone takes a piece and smiles, you get this little hit of pride knowing you made that magic happen.
Recipe FAQs
- → How do I know when the mixture is ready?
Bring the sugar mixture to 300°F (150°C), the hard crack stage, which ensures a brittle, crunchy texture.
- → Can I substitute peanuts with other nuts?
Yes, you can swap peanuts for cashews, almonds, or pecans to vary the flavor and texture.
- → What is the role of baking soda in the mixture?
Baking soda lightens the toffee by creating tiny air bubbles, resulting in a lighter and more brittle final product.
- → How should I store the brittle?
Store in an airtight container away from humidity to maintain its crunchy texture for up to two weeks.
- → Can I add a salty finish to the candy?
Sprinkling flaky sea salt over the brittle before it sets enhances the flavor with a pleasant salty contrast.