 Pin It
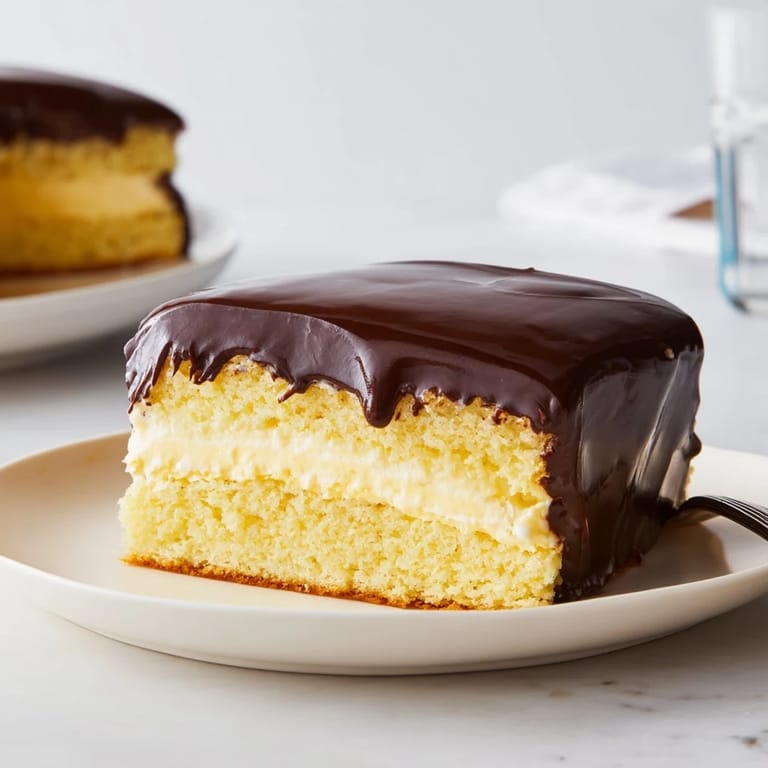
 My grandmother kept a worn index card for Ho Ho cake wedged between her favorite cookbooks, the edges soft from years of being pulled out during winter holidays. There was something about the way she'd hum while assembling it—layering that fluffy cream between tender cake, then pouring dark chocolate down the sides like she was icing a masterpiece. I watched her hands work with such confidence, and I realized this wasn't just a dessert; it was her love language in cake form. Now when I make it, I understand why she never needed fancy decorations or trendy flavors.
I made this for a small dinner party when I was trying to impress my boyfriend's coworkers, and someone asked for the recipe before dessert was even finished. That moment—watching people close their eyes when they took the first bite—taught me that simple, nostalgic flavors often win over complicated modern twists. It became the dessert I'd make whenever I wanted to feel confident in the kitchen.
Ingredients
- All-purpose flour (2 cups): This is the foundation, and room temperature ingredients mix best with it for a tender crumb.
- Baking powder and baking soda (2 tsp and 1/2 tsp): They work together to give the cake lift without making it dense—don't skip sifting them together.
- Unsalted butter (3/4 cup for cake, 1/2 cup for filling): Softened butter creams properly; cold butter fights back and creates lumps.
- Granulated sugar (1 1/2 cups): This sweetens and aerates the batter when creamed with butter, creating that light texture.
- Eggs (3 large): Add them one at a time so they fully incorporate and don't break the emulsion.
- Vanilla extract (2 tsp for cake, 1 tsp for filling): Quality matters here since it's a star ingredient in such a simple cake.
- Whole milk (1 cup): The fat content keeps the cake moist and tender, so don't substitute with skim.
- Powdered sugar (1 cup): It dissolves into the cream filling, creating a silky texture that granulated sugar can't achieve.
- Heavy cream (1 cup plus 1/2 cup for ganache): Cold cream whips to peaks; room temperature cream becomes butter.
- Semi-sweet chocolate chips (1 cup): They melt smoothly in the ganache and won't overpower the delicate cake.
Tired of Takeout? 🥡
Get 10 meals you can make faster than delivery arrives. Seriously.
One email. No spam. Unsubscribe anytime.
Instructions
- Prepare your stage:
- Preheat to 350°F and line your 9x13 pan with parchment—this prevents sticking and makes removal so much easier. Grease the paper lightly so the cake doesn't slip during baking.
- Mix the dry ingredients:
- Whisk flour, baking powder, baking soda, and salt together so every bit of leavening is evenly distributed throughout the flour. This prevents streaks of dense or overly risen cake.
- Cream butter and sugar:
- Beat them together for 2-3 minutes until pale and fluffy—this is where air gets incorporated into the batter. If it still looks wet and heavy after a minute, keep going.
- Incorporate eggs and vanilla:
- Add eggs one at a time, beating between each addition so they fully emulsify into the butter mixture. Add vanilla last and beat until everything is smooth and uniform.
- Alternate wet and dry:
- Start with flour, then milk, then flour, ending with flour—this protects the batter from overmixing. Mix only until streaks of flour disappear; overmixed batter becomes tough.
- Bake the cake:
- Smooth the top of the batter so it rises evenly, then bake 25-30 minutes until a toothpick comes out clean. The cake should pull slightly away from the edges and be golden on top.
- Cool completely:
- Leave the cake in the pan on a wire rack until it's completely cool to the touch—this prevents the cream filling from melting into puddles. You can speed this up by setting the pan in a cooler spot.
- Make the cream filling:
- Beat softened butter and powdered sugar until smooth and creamy, then in a separate bowl, whip cold heavy cream with vanilla and salt to stiff peaks. Gently fold the whipped cream into the butter mixture with a spatula, being careful not to deflate those peaks.
- Layer the cake:
- Turn the cooled cake out onto a cutting board and use a serrated knife to slice it into two even layers by cutting slowly and letting the knife do the work. Spread the cream filling on the bottom layer, then set the top layer back down like you're closing a book.
- Make the ganache:
- Heat heavy cream and butter together until steaming, pour over chocolate chips, and let sit undisturbed for 2 minutes before stirring—the residual heat melts the chocolate perfectly. Stir until the mixture is glossy and smooth with no lumps.
- Glaze and chill:
- Pour the warm ganache over the assembled cake and spread it evenly with an offset spatula or the back of a spoon. Refrigerate for at least 30 minutes so the ganache sets and the layers fuse together properly.
 Pin It
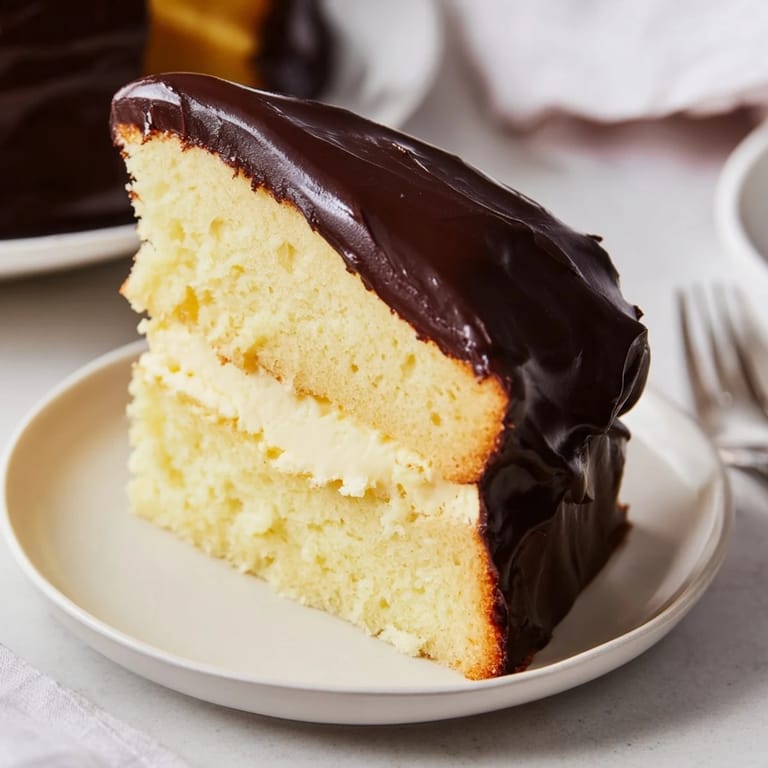
 Years later, I baked this for my mom when she was going through a rough patch, and she told me it tasted like home—which meant more to me than any compliment about my baking skills. That's when I realized this cake exists in that perfect space where nostalgia and comfort intersect.
The Science of Tender Cake
The secret to the gentle crumb in Ho Ho cake is the combination of whole milk and the creaming method. When you cream butter and sugar, you're trapping tiny air bubbles that expand in the oven, creating lift. The milk adds moisture and fat, keeping everything tender instead of dry. I learned this the hard way when I once tried a boxed cake mix thinking it would be easier—the texture was nothing like the real thing, and I never made that mistake again.
Filling Variations That Still Feel Right
While the whipped cream filling is the classic version, I've experimented with substitutions that honor the original spirit. Marshmallow fluff creates an even lighter, airier texture that some people find more nostalgic. A mascarpone-whipped cream blend adds subtle tang without overwhelming the delicate vanilla notes. The one rule I follow: whatever you choose must remain fluffy and pale, because the contrast with dark chocolate matters.
Storage and Serving Wisdom
This cake actually improves after a day or two in the refrigerator as the layers meld together and flavors deepen. I always slice it with a warm knife, running it under hot water and wiping it dry between cuts for clean edges. Pair each slice with strong black coffee or cold milk—never lukewarm, and always let the cake sit at room temperature for 10 minutes before eating so the cake isn't dense and the ganache has a slight give.
- Cover leftover cake tightly so it doesn't absorb refrigerator smells or dry out.
- It keeps beautifully for three days, making it perfect for baking ahead of gatherings.
- Slice extra and freeze individual pieces for yourself on mornings when you need a little comfort.
 Pin It
 Every time I make this cake, I think of my grandmother's worn index card and feel grateful for the tradition she passed down. It's a dessert that proves you don't need complexity to create something truly memorable.
Recipe FAQs
- → What ingredients make the yellow cake tender?
The combination of unsalted butter, sugar, eggs, and milk contributes to the tender crumb of the yellow cake.
- → How is the vanilla cream filling prepared?
Butter and powdered sugar are creamed smooth, then whipped cream with vanilla is folded in for a light, fluffy texture.
- → What is the purpose of the chocolate ganache glaze?
The ganache adds a rich, glossy chocolate finish that complements the light layering inside the cake.
- → How should the cake be assembled after baking?
Once cooled, the cake is sliced horizontally, filled with vanilla cream, then topped and covered with ganache.
- → Can this dessert be stored, and how long does it last?
Stored covered in the refrigerator, it keeps fresh for up to three days.
- → What tools are essential for preparing this dessert?
A 9x13-inch baking pan, electric mixer, serrated knife, saucepan, and mixing bowls are needed.