 Pin It
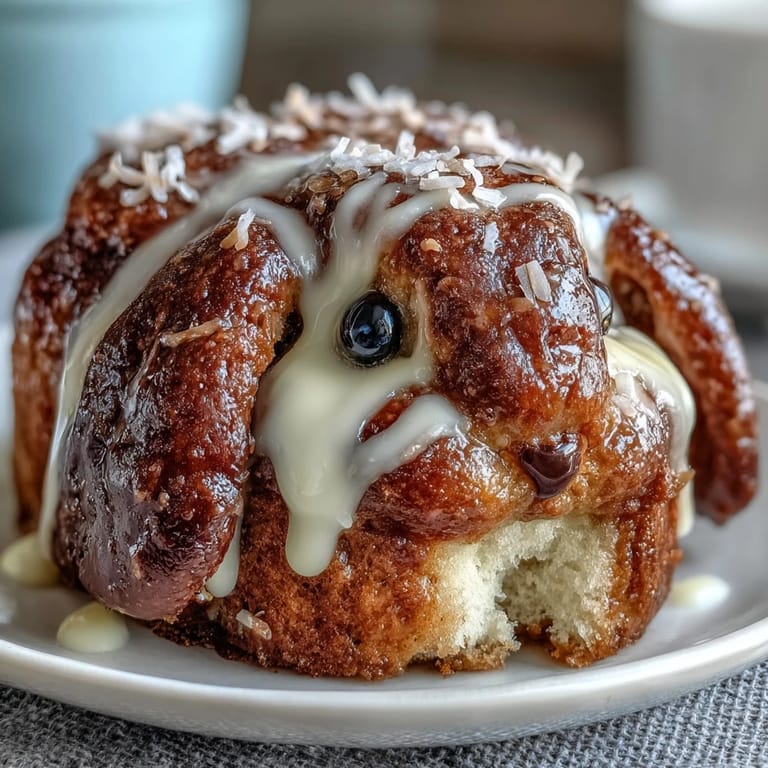
 My daughter spotted this Easter Bunny Cake in a bakery window three years ago and wouldn't stop talking about it for weeks. The idea of a cake shaped like an actual bunny seemed impossibly fancy until I realized it was just two round layers cleverly arranged with frosting holding everything together. That Easter, I decided to make one from scratch, and what started as an ambitious project turned into one of those kitchen moments where my hands got sticky, the coconut went everywhere, and somehow it all came together beautifully.
I'll never forget watching my son's face light up when he realized the bunny had jelly bean eyes that he could actually eat. His cousins started a debate about whether the licorice whiskers tasted better than the marshmallow tail, and suddenly this cake became less about looking cute and more about everyone gathering around it with real joy. That's when I understood why people bake things that aren't just delicious but also a little bit magical.
Ingredients
- All-purpose flour: The foundation of your cake layers; make sure it's measured by spooning into your measuring cup and leveling rather than scooping straight from the bag, which compacts the flour and makes the cake dense.
- Baking powder: This is what gives your cake that tender, light crumb that melts on your tongue.
- Salt: A small pinch that makes the vanilla flavor pop and balances the sweetness.
- Unsalted butter: Use it softened to room temperature so it creams properly with the sugar; cold butter will result in a grainy, uneven texture.
- Granulated sugar: This sweetens the cake and creams with the butter to incorporate tiny air bubbles that make the cake fluffy.
- Eggs: Add them one at a time and beat well after each addition so they emulsify properly and create a stable batter.
- Pure vanilla extract: Not the imitation stuff; it makes a noticeable difference in flavor depth.
- Whole milk: The liquid that keeps the cake moist and tender without making it dense.
- Powdered sugar for frosting: Sift it before using so you don't end up with lumpy frosting that feels grainy.
- Sweetened shredded coconut: This gives the bunny its fluffy, cloud-like appearance and adds a subtle tropical sweetness.
- Pink food coloring: A few drops go a long way; you only need enough to tint the inner ears and nose a soft, cheerful pink.
- Jelly beans, licorice, marshmallows, and chocolate chips: These are where your personality shines; use what makes you smile when you look at the finished bunny.
Tired of Takeout? 🥡
Get 10 meals you can make faster than delivery arrives. Seriously.
One email. No spam. Unsubscribe anytime.
Instructions
- Get your pans ready:
- Preheat your oven to 350°F and grease both round pans with butter, then dust them lightly with flour so your finished cakes slip out cleanly. A little extra care here prevents the frustration of cake sticking to the pan later.
- Mix your dry ingredients:
- Whisk the flour, baking powder, and salt together in a bowl so everything is evenly distributed and you don't have pockets of baking powder that create weird bumps in your cake.
- Cream butter and sugar:
- Beat the softened butter with the sugar for about three minutes until it's pale and fluffy; you're essentially whipping air into the mixture, which is what makes your cake light and tender. It should look like fluffy clouds when you're done.
- Add eggs one at a time:
- After each egg goes in, beat well so it fully incorporates before you add the next one; this creates a stable emulsion that keeps your cake moist. If you just dump all the eggs in at once, they won't blend properly.
- Alternate dry and wet ingredients:
- Start with some flour mixture, then milk, then flour again, ending with flour; this prevents the batter from becoming too thin or overmixed. Think of it like a little dance: flour, milk, flour, milk, flour.
- Divide and bake:
- Pour the batter evenly between your prepared pans and smooth the tops so they bake evenly. Bake for 30 to 35 minutes until a toothpick inserted in the center comes out clean, then let them cool in the pans for ten minutes before turning them out onto wire racks.
- Make your frosting:
- While the cakes cool completely, beat the softened butter until it's creamy and smooth, then gradually add the sifted powdered sugar so you don't get lumps. Add the milk and vanilla and beat until it's light and fluffy, almost like whipped cream.
- Reserve pink frosting:
- Scoop out about half a cup of white frosting into a separate bowl and add just a drop or two of pink food coloring, mixing gently until you have a soft, bunny-appropriate pink.
- Cut and arrange your bunny shape:
- Once your cakes are completely cool, take one round cake and carefully cut it to form the bunny's ears (two elongated shapes from the sides) and a bow tie from the center. Arrange one whole round cake on your serving board as the face, place the ear shapes above it, and position the bow tie below.
- Crumb coat first:
- Spread a thin layer of white frosting over the entire bunny shape and chill it for fifteen minutes; this seals in any crumbs so your final frosting looks smooth and professional. It's an extra step that makes an enormous difference.
- Apply final frosting:
- Generously frost the cake with the remaining white frosting, making swirls and peaks that look natural and inviting. Immediately press the shredded coconut all over the frosted surface while the frosting is still soft so it sticks and creates that fluffy cloud effect.
- Decorate with personality:
- Use the pink frosting to fill in the inner ear shapes and the nose, then add your jelly beans for eyes, chocolate chips or edible gel for the nose, licorice strings for whiskers, and mini marshmallows for the cheeks and tail. Let yourself have fun here; there's no wrong way to arrange a face.
 Pin It
 There was a moment, standing in my kitchen at sunset on Easter morning with coconut dust all over my apron and my hands sticky with frosting, when I realized this cake represented something bigger than just dessert. It was me saying yes to something that felt a little bit ambitious, and showing my kids that beautiful things are worth the mess and the effort.
Why This Cake Works Year After Year
The vanilla cake stays moist for days, and the coconut frosting is forgiving enough that if your first frost isn't perfect, you can absolutely fix it by adding more coconut or even adjusting the pink frosting balance. Every Easter, families pull out this recipe because it delivers that magical moment when a simple cake becomes a memory, and that matters more than whether the ears are perfectly symmetrical or the eyes are lined up just right.
Customizing Your Bunny
You can absolutely make this cake your own by changing the decorations or even the frosting flavor; I've made versions with cream cheese frosting for a tangier taste, and I've toasted the coconut first for a deeper, nuttier flavor that adults seem to love. The bones of the cake stay the same, but the personality is entirely yours, which is what makes baking something homemade so much better than buying it from a bakery.
Make-Ahead Magic and Storage Tips
The cake layers can be baked a full day ahead and wrapped tightly, which takes so much pressure off the morning of your celebration. You can even frost the entire bunny a few hours before serving, and it will hold beautifully on the counter, or in the refrigerator if your kitchen is particularly warm. Just remember that the frosting firms up when chilled, so if you're decorating ahead, add your candy decorations right before serving so they don't stick awkwardly into the frosting.
- Wrap cooled cake layers individually in plastic wrap and store them in an airtight container for up to 24 hours before frosting.
- The fully frosted bunny can sit at room temperature for up to 6 hours, or in the refrigerator for up to 12 hours before any frosting starts to break down.
- If you need to transport this cake, carefully place it on a serving board and keep it in a cool car or ask your host if you can refrigerate it until serving time.
 Pin It
 This cake teaches you that baking is about showing up and trying, not about perfection, and somehow that's the most delicious lesson of all. I hope your Easter table becomes just as full of joy and a little bit of coconut dust as mine.
Recipe FAQs
- → How do I achieve fluffy coconut frosting?
Beat softened butter until creamy, then gradually add powdered sugar, milk, and vanilla extract. Finish by folding in shredded coconut for added texture.
- → What is the best way to shape the bunny layers?
After cooling, cut one cake into ear shapes and a bow tie, then arrange with the main round layers on a large platter to form the bunny shape.
- → Can the cake layers be prepared in advance?
Yes, cake layers can be baked a day ahead and stored tightly wrapped to maintain freshness before assembly.
- → Are there alternatives to shredded coconut for topping?
Toasted coconut can be used for extra flavor or cream cheese frosting for a tangy variation.
- → What decorations work well for the bunny face?
Use pink-tinted frosting for ears and nose, jelly beans for eyes, licorice strings for whiskers, and mini marshmallows for cheeks and tail.
- → What beverages pair nicely with this cake?
Light Moscato or lemonade complements the sweetness and festive nature of this creation perfectly.