 Pin It
 When I stood in the kitchen last spring, streaks of blue food coloring dotted my fingers as music played from the living room and anticipation built for my nephew's graduation. I never anticipated how much fun mixing three shades of blue could be until the batter started looking like a painter's palette. The scent of vanilla, butter, and sugar filled the air as the layers baked, each gradually deepening in hue. After years of baking cakes for birthdays and small milestones, this dramatic ombre creation marked new territory — both in artistry and celebration. It felt like the sort of cake that signaled something truly significant, and I caught myself grinning at the gold streaks glinting in the afternoon light.
The first time I served this cake, my brother joked that it was "almost too handsome to eat," but after the big toast, every slice vanished with satisfied sighs. Decorating with edible gold leaf felt easier than expected, and I remember my niece patiently helping place each shimmer while graduation photos stacked up on the table. It became a ritual — laughter, teamwork, and small flour explosions turning the kitchen into a party headquarters. Letting the frosting settle as we discussed future plans made the process taste sweeter, somehow. That cake didn’t just celebrate a diploma, it celebrated everyone there.
Ingredients
- All-purpose flour: Gives the cake sturdy structure, and sifting it keeps layers light and even.
- Baking powder & baking soda: Essential for lift; always double-check freshness before baking.
- Salt: Adds balance to the sweetness, a small but important touch.
- Unsalted butter: Room temperature butter creates fluffier crumb and richer taste; I let it sit out until soft to the touch.
- Granulated sugar: Ensures a classic sweet bite and helps the layers caramelize just right.
- Eggs: Provide moisture and structure, and beating them well helps everything rise beautifully.
- Vanilla extract: Brings out a cozy aroma — one teaspoon more can intensify flavor if desired.
- Whole milk: Room temperature milk mixes smoothly, no curdling worries; the right richness is key.
- Blue gel food coloring: Gel colors are more potent, so a little goes a long way for vibrant ombre.
- Powdered sugar: Sifted, it yields a lump-free, lush buttercream texture.
- Milk or cream: Adds smoothness to frosting; use cream for a richer finish.
- Edible gold leaf or dust: Brings the wow factor — gently place with dry hands for best results.
- Clear alcohol: Use if brushing gold dust; it evaporates, leaving sparkle without flavor.
- Parchment paper: Prevents sticking, so cake layers lift out beautifully.
Tired of Takeout? 🥡
Get 10 meals you can make faster than delivery arrives. Seriously.
One email. No spam. Unsubscribe anytime.
Instructions
- Prep Your Pans:
- Grease and line three 8-inch pans, listening for that comforting hum from the oven preheating. The parchment makes lifting the layers effortless later.
- Mix the Dry Ingredients:
- Whisk flour, baking powder, soda, and salt — the sound of the whisk signals you're just getting started. Keeping everything evenly mixed yields even rise.
- Cream Butter and Sugar:
- Let the mixer beat butter and sugar until pale and fluffy, a sight that always reminds me of birthdays past. The aroma is half the fun.
- Add Eggs and Vanilla:
- Drop in eggs one at a time, letting them blend until glossy and smooth. A splash of vanilla rounds it all out perfectly.
- Combine with Milk and Flour:
- Add dry mix and milk in turns; the batter gets silky but avoid over-mixing. You'll see the smooth texture appear — that's your cue to stop.
- Tint the Layers:
- Divide batter into three bowls, swirling gel food color for light, medium, and dark blue shades. It’s okay if your hands get a bit messy — it’s part of the fun.
- Bake and Cool:
- Pour each colored batter into the pans, smooth the tops, and bake. Let the kitchen fill with sweetness as layers cool before assembly.
- Prepare Buttercream:
- Beat butter until creamy, then gradually add powdered sugar for a thick, spreadable frosting. Mix in vanilla and milk until just right for swirling.
- Color the Buttercream:
- Reserve one cup for crumb coat, then tint the rest dark blue. The deep color gives the cake its bold finish.
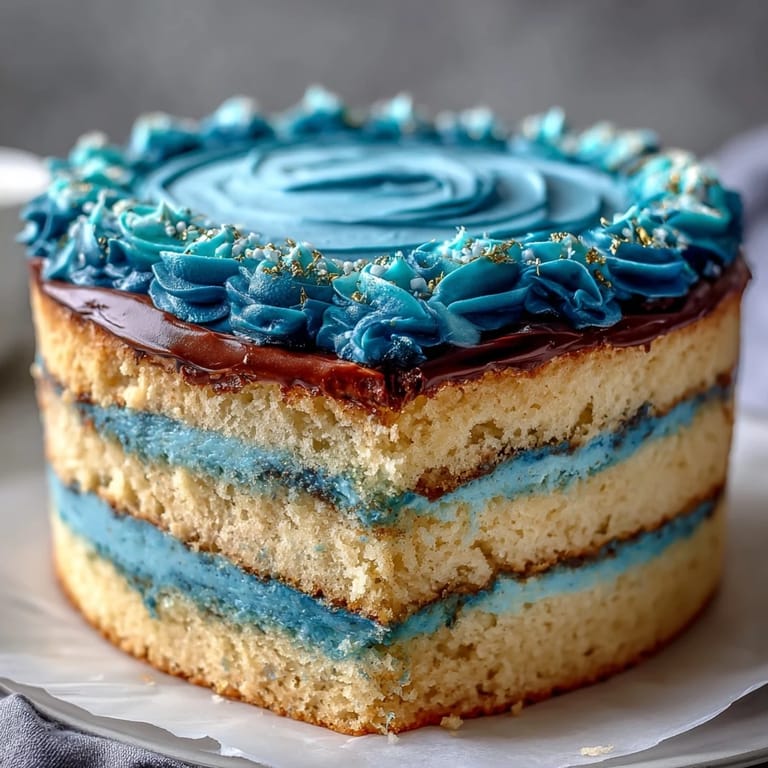
- Assemble the Layers:
- Level cakes if needed and stack from darkest to lightest, spreading buttercream between. Pause here to admire your gradient before continuing.
- Apply Crumb Coat:
- Cover the cake lightly with reserved buttercream and chill. This step keeps the final coat smooth (and gives you a break).
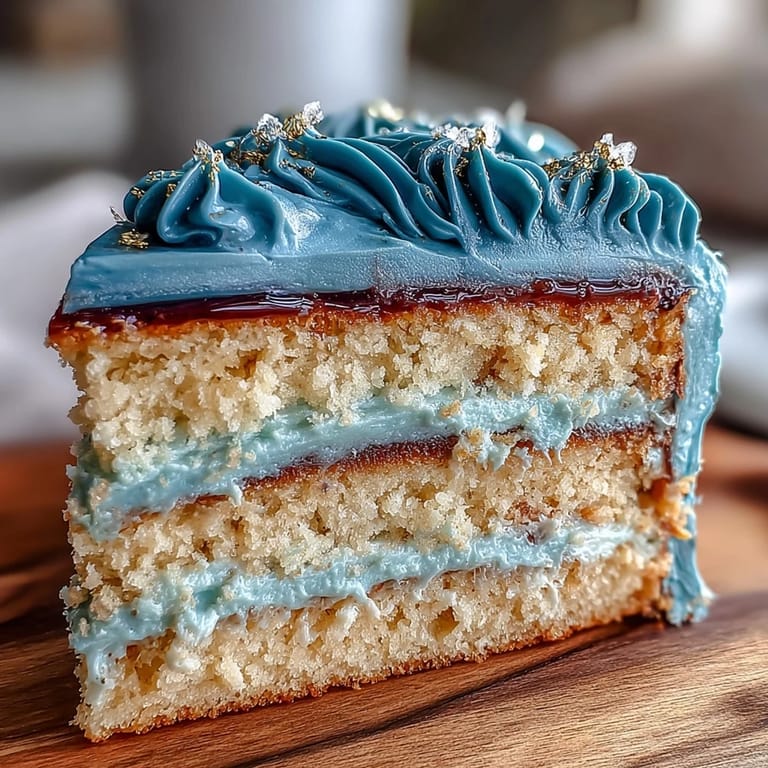
- Frost and Ombre:
- Swirl dark blue buttercream all around, then blend in lighter hues up top if you wish. The ombre effect comes to life as you smooth it out.
- Add Gold Decorations:
- Gently place edible gold leaf or brush dust on, aiming for streaks or edges — don't stress about perfection. The shimmer makes it special.
- Chill and Serve:
- Let the cake set in the fridge until ready to slice. It’s key for a clean cut and dramatic reveal.
 Pin It
 There was a moment during the decorating process when gold leaf stuck to my finger instead of the cake, and laughter filled the kitchen as I tried to gently transfer it. The cake became an anchor for every warm hug and joke, a centerpiece for the proudest moment. Even the smallest mishap became a cherished story, remembered whenever graduation photos are revisited.
What Makes Graduation Cakes Special
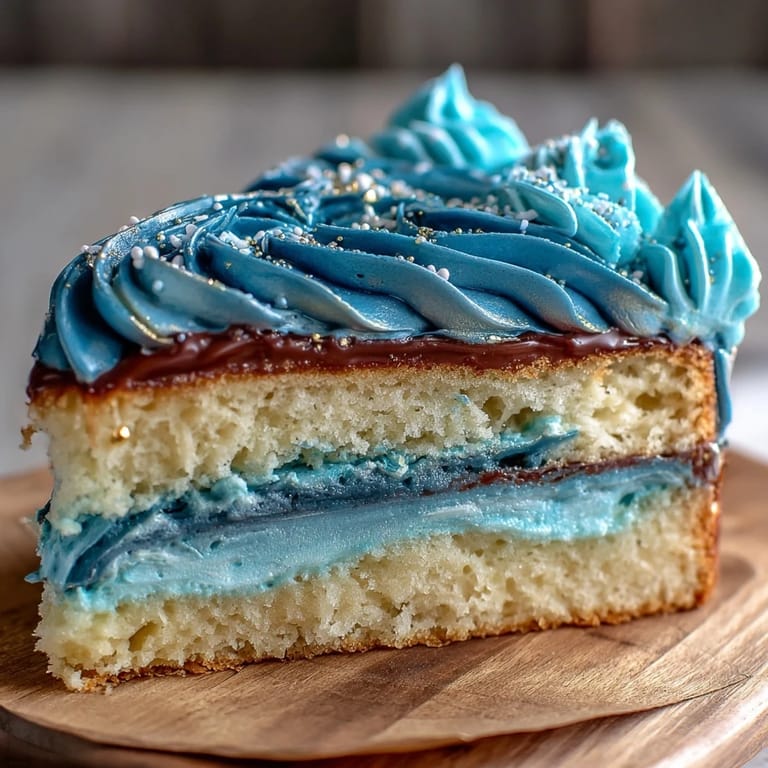
Layering blue tones for a graduation cake feels symbolic—each shade marks the challenges and triumphs that led to the big day. Watching the dark blue fade upward to pale blue reminds us of journeys, and the shimmer of gold signals new beginnings. The cake turns ceremony into celebration and routine into ritual. Decorating together always adds laughter and camaraderie, making the process just as memorable as the event.
How to Nail the Ombre Layers
When tinting batter for ombre cakes, start cautiously—adding color slowly ensures you don’t overshoot and end up with an unintended shade. If I ever go a little darker than planned, I lighten the next bowl by adding more batter or a dash of milk. Use separate spatulas for each color to avoid muddying the gradient. It’s one of those steps where patience goes a long way and gives you a visually stunning final result.
Handling Edible Gold and Final Touches
Working with edible gold is easier than it looks, but the key is dry hands and steady placement. A slight breeze or even your breath can send gold leaf flying, so stay close and apply gently, letting the shimmer catch the light and smiles. Every finishing touch builds excitement for the big reveal.
- If using gold dust, mix with clear alcohol to help it stick and shine.
- Let the finished cake chill before serving for crisp, clean slices.
- The ombre buttercream blends best when scraped with an offset spatula in upward motions for a seamless look.
 Pin It
 This graduation cake brings artistry to tradition and makes milestones even sweeter. Sharing a slice is like sharing pride, joy, and a little golden courage for the journey ahead.
Recipe FAQs
- → How is the ombre effect achieved?
The batter is divided and tinted with varying shades of blue, creating distinct layers for a dramatic gradient appearance.
- → What frosting is used?
A rich vanilla buttercream forms both the crumb coat and final frosting, tinted with dark blue for the ombre finish.
- → How are gold decorations applied?
Edible gold leaf or dust is added in streaks or edges, using clear alcohol for gold dust as needed, giving a luxurious touch.
- → Can I use fewer cake layers?
The ombre effect is most dramatic with three or more layers, but the method works with fewer; adjust coloring intensity accordingly.
- → Are there allergen concerns?
Ingredients include wheat, eggs, and dairy. Some gold decorations may contain other allergens; check packaging for details.